Vault React
Vault React is an NPM package that allows you to embed Apideck Vault into your React application. You can easily let your users authorize and manage integration settings. It makes credential handling more secure and seamless.
This guide will get you up and running with the Vault React hook. To get started, follow these 3 steps:
Step 1: Setup Apideck
Create an account
If you haven't already, head over to our Signup page and create an account. Choose an application name and a subdomain. Afterward, you will be redirected to the Apideck dashboard.
Enable Unified APIs and connectors
Go to the Unified APIs page in the Apideck dashboard. Choose one or more Unified APIs to enable. You'll see a list of the available connectors for each Unified API. Choose a couple of connectors to enable. The Unified APIs and connectors you select become available to your users in Vault.
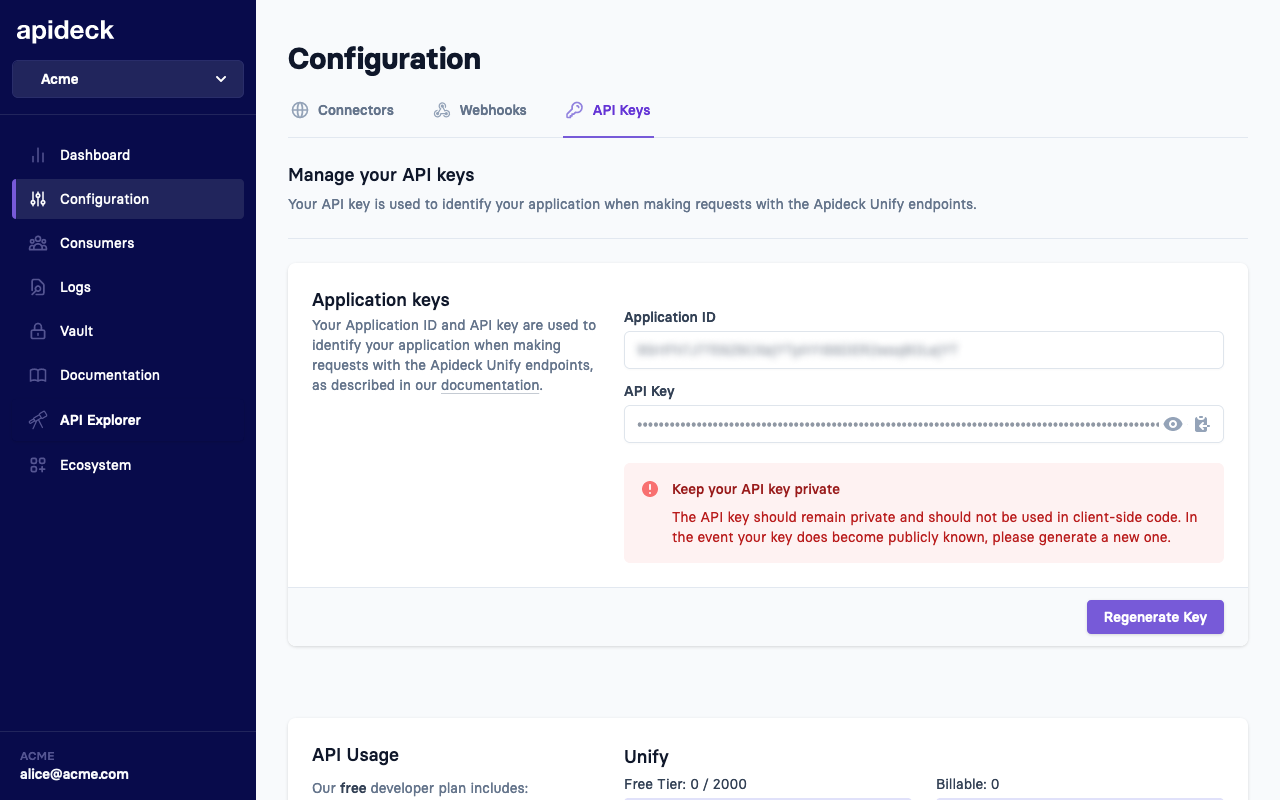
Get your API key and Application ID
Go to the API Keys page in the Apideck dashboard. Copy your application ID and API key. If your API key ever gets compromised, you can regenerate it on this page.
Step 2: Create a session
Vault lets your users (called consumers in Apideck) easily connect and configure integrations. You can create a consumer through a Vault session through the following endpoint https://developers.apideck.com/apis/vault/reference#tag/Sessions.
Most of the time, this is an ID of your internal data model that represents a user or account in your system. E.g., account:12345. If the consumer doesn't exist yet, Vault will upsert a consumer based on your ID.
Note 🚨
Session creation should always happen server-side to prevent token leakage.
Use the API call below to create a session for a consumer. This will return a Vault URL that you forward to a consumer to connect integrations.
You can also use our Node SDK to create a session.
Below is an example of creating a Serverless Function to create a session inside a Next.js project:
The returned
dataobject will include the
session_tokenthat you can use pass as the
jwtprop to the
openfunction from the
useVaulthook. It also includes a
session_uri, which is a link to the Hosted Vault application. You can use this link if you don't want to use
vault-reactand redirect the user to the hosted solution.
Step 3: Add Vault React
Vault lets your users authorize connectors and manage integration settings. It stores the credentials securely and lets you make authorized API calls on your consumers` (users) behalf. To get started, install the component using NPM or Yarn.
Next, import the
useVaulthook pass the JSON Web Token to the
openfunction.
If you want to only show integrations for a single Unified API, you can do that by passing the
unifiedApiprop. If you want to open Vault for only a single integration, you can provide the
serviceIdprop.
If you want to get notified when the modal opens and closes, you can provide the
onReadyand
onCloseoptions. You can also provide the
onConnectionChangeand
onConnectionDeleteoptions to get notified when the state of a connection changes or gets deleted.
If you want to open a specific view you can pass the
initialViewprop. The available views are
settings,
configurable-resources, and
custom-mapping.
If you want to open Vault in a specific language you can add the
localeprop. The available locales are
en(default),
nl,
de,
fr, and
es.
If you want to show the language switch at the bottom of Vault you can add the
showLanguageSwitchprop.
Demo
The code block below shows a quick demo on how you could use the Vault component. Click the button to execute the code that's shown below.
LoadingProperties
| Property | Type | Required | Default | Description |
|---|---|---|---|---|
| token | string | true | - | The JSON Web Token returned from the Create Session API |
| showAttribution | boolean | false | true | Show "Powered by Apideck" in the backdrop of the modal backdrop |
| onClose | () => void | false | - | Function that gets called when the modal is closed |
| onReady | () => void | false | - | Function that gets called when the modal is opened |
| onConnectionChange | (connection: Connection) => void | false | - | Function that gets called when the user updates a connection. This can be linking their account, filling out settings or adding a new connection |
| onConnectionDelete | (connection: Connection) => void | false | - | Function that gets called when the user deletes a connection |
| unifiedApi | string | false | - | When unifiedApi is provided it will only show integrations from that API. |
| serviceId | string | false | - | When unifiedApi and serviceId are provided Vault opens a single integration |
| initialView | ConnectionViewType | false | - | Open Vault in a specific view for a connection session |
| locale | string | false | "en" | Open Vault in a specific language: "en", "nl", "de", "fr" or "es" |
| showLanguageSwitch | boolean | false | false | Show language switch at bottom |