Authorize a connector using the Vault API
Instead of redirecting directly to the Hosted Vault, you can use the Vault API to build custom solutions and integrate better with your own application. When using the Vault API to build your own implementation, there are multiple ways of allowing your customers to authorize connections:
- Use React Vault
- Redirect to Hosted Vault
- Completely build into your own app
Before we go over the different solutions it’s important to know that it’s required to obtain a Vault Session. This session is needed to identify the consumer that wants to connect to one or more services.
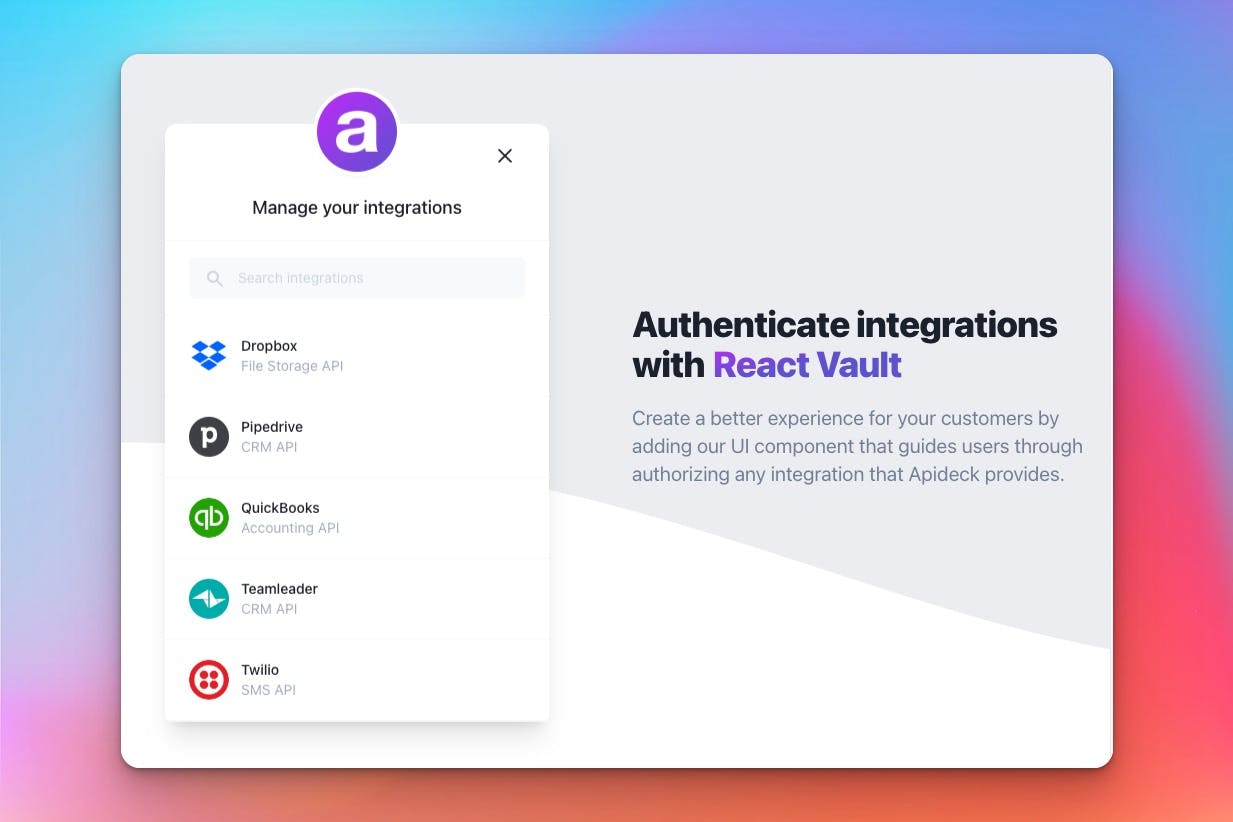
Option 1: Vault JS
Inside your application you can use Vault JS to quickly provide an embedded experience for your customers. With a simple NPM install, you can have a component that will handle every step of connecting your users to the desired service.
We also have specific React and Vue packages to make it even easier to integrate Vault into your application.
Open Apideck Vault
You can find the
unifiedApiand
serviceIdon the Connection object returned from the Get Connections call.
Option 2: Redirecting to the Hosted Vault connection page
When you want your customer to authorize a specific connection, you can add a call-to-action in your application that redirects to a connection page of Hosted Vault.
The URL to redirect needs to be built up like this:
You can find the
unified_apiand
service_idon the Connection object returned from the Get Connections call. The
tokenis the Vault Session token that gets returned after creating a session.
Session settings
When creating a Vault Session you can provide a few settings to improve the customer experience.
Using the
auto_redirectsetting, you can tell Hosted Vault to automatically redirect back to your application when the connection has been updated and its state has become
callable.
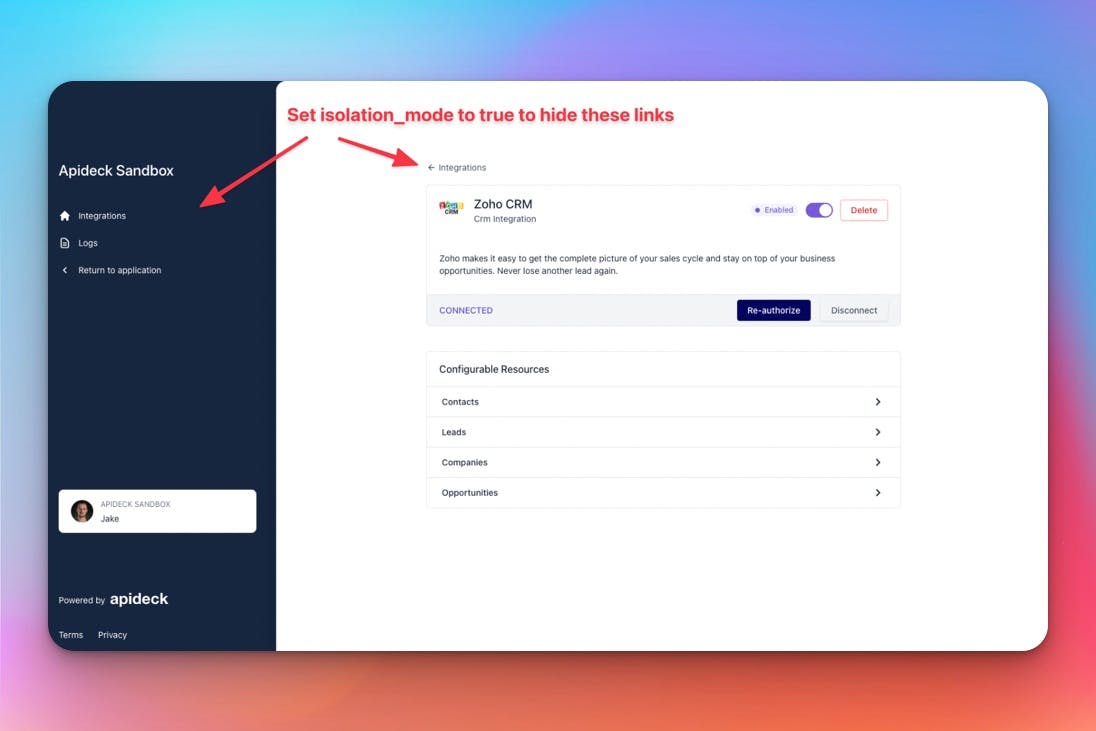
You can combine this by setting
settings.isolation_modeto
trueto ensure the navigation link that points to the “integrations overview" is hidden from in the UI of Hosted Vault.
When creating your Vault Session it’s important to ensure you have provided a
redirect_uri, which will be used to redirect.
For all the session options you can provide, go here: sessionsCreate
Option 3: Completely built into your application
If you want to authorize a connection without leaving your application, you could use the
authorize_urlthat is being returned from the Get Connections call directly.
Example Get connection response:
If you do so, you have to append a
redirect_uriparam to the
authorize_url, be sure to URL encode the
redirect_uriparam.
Be aware: By doing this, you can redirect back directly to your application, but you’ll need to handle any potential errors yourself. It could also be that a connection still needs some additional configuration from your customer. Hosted Vault can handle this for you, but if you redirect to your own application, you will need to build it yourself.

For this reason, we usually recommend redirecting back to Hosted Vault. If you do, ensure you append your vault token. The complete URL you will have to use should look something like this: