How to Create an OAuth App for Zendesk Sell
Follow the steps below to create an OAuth application for Zendesk Sell.
Prerequisites
Before you begin, make sure you have the following:
- A Zendesk account
- An Apideck account
You can sign-up for a trial account at Zendesk or directly from within the Apideck Platform by clicking on the
Sign uplink.

Sign in to Zendesk Sell
Go to Zendesk and sign in with your account.
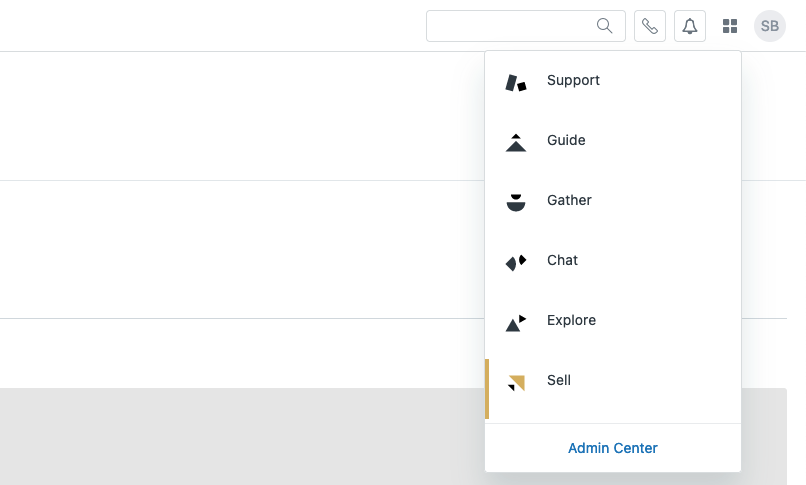
After you've signed in, click on the
squaresicon in the top navigation, and click on the
Sellmenu item to navigate to Zendesk Sell.
Create an OAuth application
From the side menu, navigate to 'Settings' > 'Integrations' > 'OAuth'
Click on the 'Developer apps' tab to view your existing OAuth applications or to create a new one.
To create a new OAuth application, click on the 'Add Developer App' button.

This will take you to a form where you can enter the required information about your app

- Name: Enter a meaningful name (for example, 'Apideck integration').
- Description: Enter a description for your app. It will be displayed on the authorize screen for users.
- Website URL: The homepage of your company’s website or the URL of your SaaS product.
- Redirect URIL: The URL where the user will be redirected after granting your app access to their Zendesk account. This should be
https://unify.apideck.com/vault/callback
. - Logo URL: The URL of your company’s logo. This will be displayed on the authorize screen for users.
- Terms of service URL: The URL of your company’s terms of service. This will be shown as linked on the authorize screen for users.
Press the 'Save' button to create your app.
Get the OAuth credentials
To view the OAuth credentials for your app, click on the 'Details' button next your app.

The OAuth
Client ID&
Client Secretfor your app are displayed in the 'Credentials' section.

💡TIP: Copy the
Client IDand the
Client Secret. You will need them in the next step.
Vault Connection Setup
Now that you have your Zendesk credentials, you can enable the integration to connect to your Zendesk instance in a secure manner.
Goto the "Apideck" > "Configuration" > "CRM" > Zendesk Sell

Enter the OAuth client ID & Secret from Zendesk Sell and review the scopes you are requesting for the integration.
Press "Save settings" to save your credentials.
You can test the connection by clicking "Test Vault", which will check if the connection is working.
Now you are ready and clients can authorize the connection to their Zendesk Sell account securely.
Do your first API call to the Zendesk Sell API
-
Connect your Zendesk account through Vault with a test session.
-
To test the access token, make a query to get your
Leads
endpoint using the CRM API.
curl --location --request GET 'https://unify.apideck.com/crm/leads' \
--header 'x-apideck-consumer-id: test-consumer' \
--header 'x-apideck-app-id: {APIDECK_APP_ID}' \
--header 'x-apideck-service-id: zendesk-sell' \
--header 'Authorization: Bearer {APIDECK_API_KEY}'
--header 'Content-Type: application/json' \
Start building with the Zendesk API
Learn what else you can build with the Zendesk Sell API.
Interested in a personalized demo? Let us know.