How to register an OAuth app for SharePoint
Register your app with Azure
1. Create a new app
Go to the Azure App registration page and click the New registration button
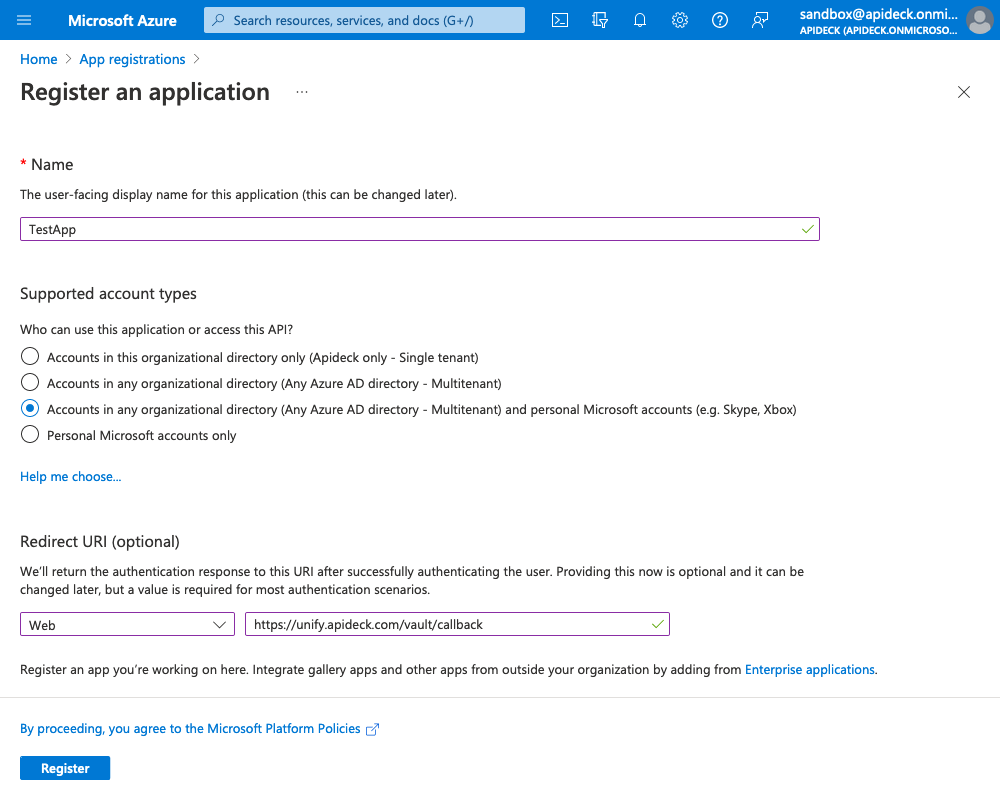
2. Enter app details
On the next page, enter your application's registration information:
- Name - Enter a meaningful application name that will be displayed to your users. Most of the time this should be your company's name.
- Supported account types - Select Accounts in any organizational directory and personal Microsoft accounts
- You can select other options if they are more relevant for you. This option supports the broadest user base.
- Redirect URI -
https://unify.apideck.com/vault/callback
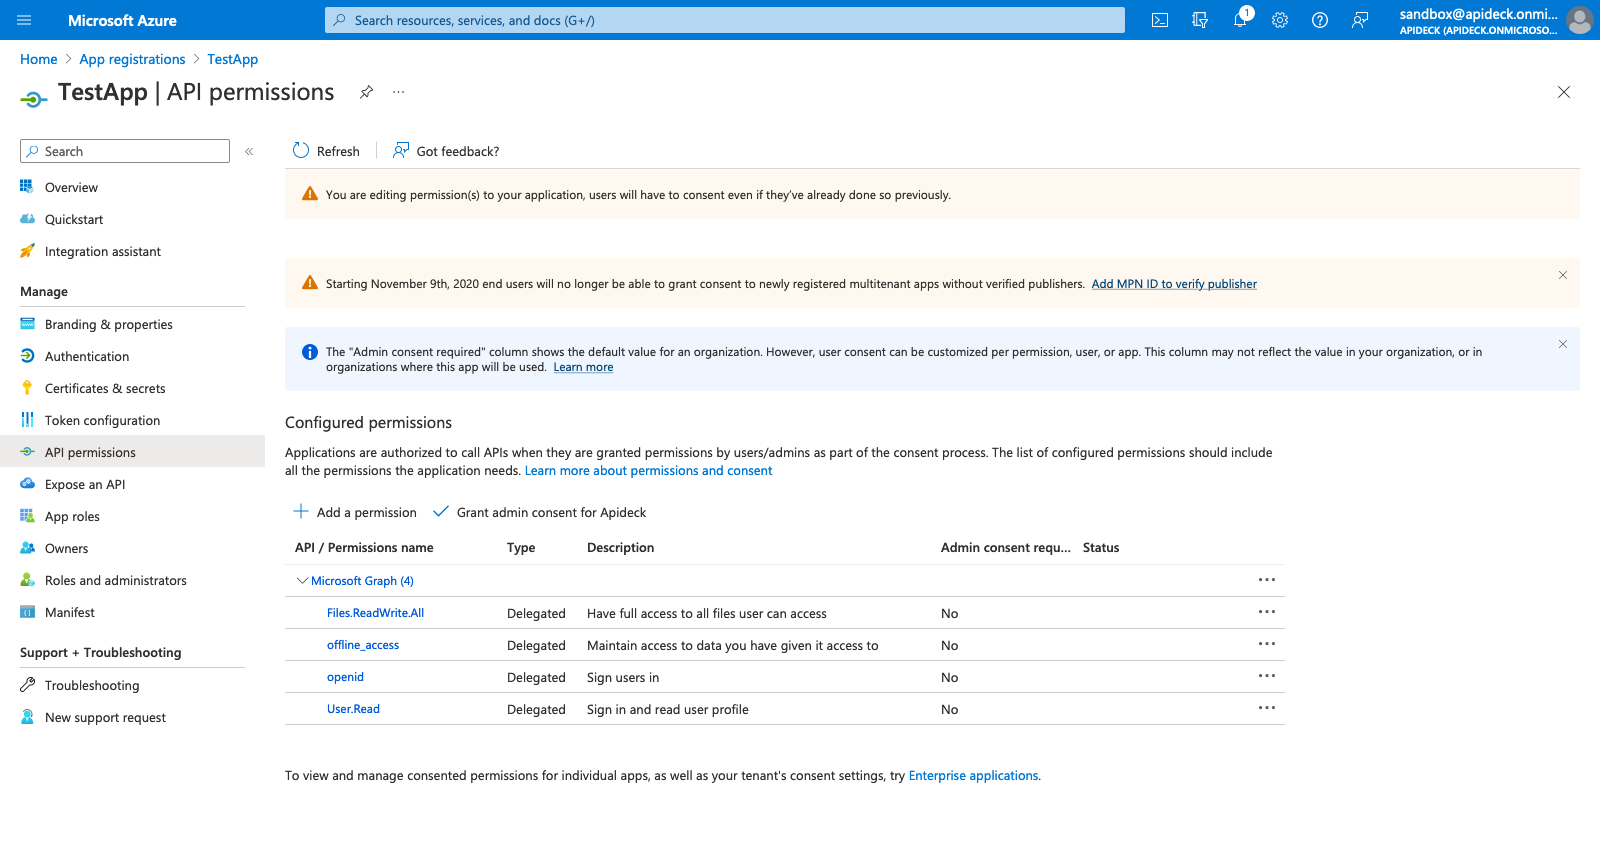
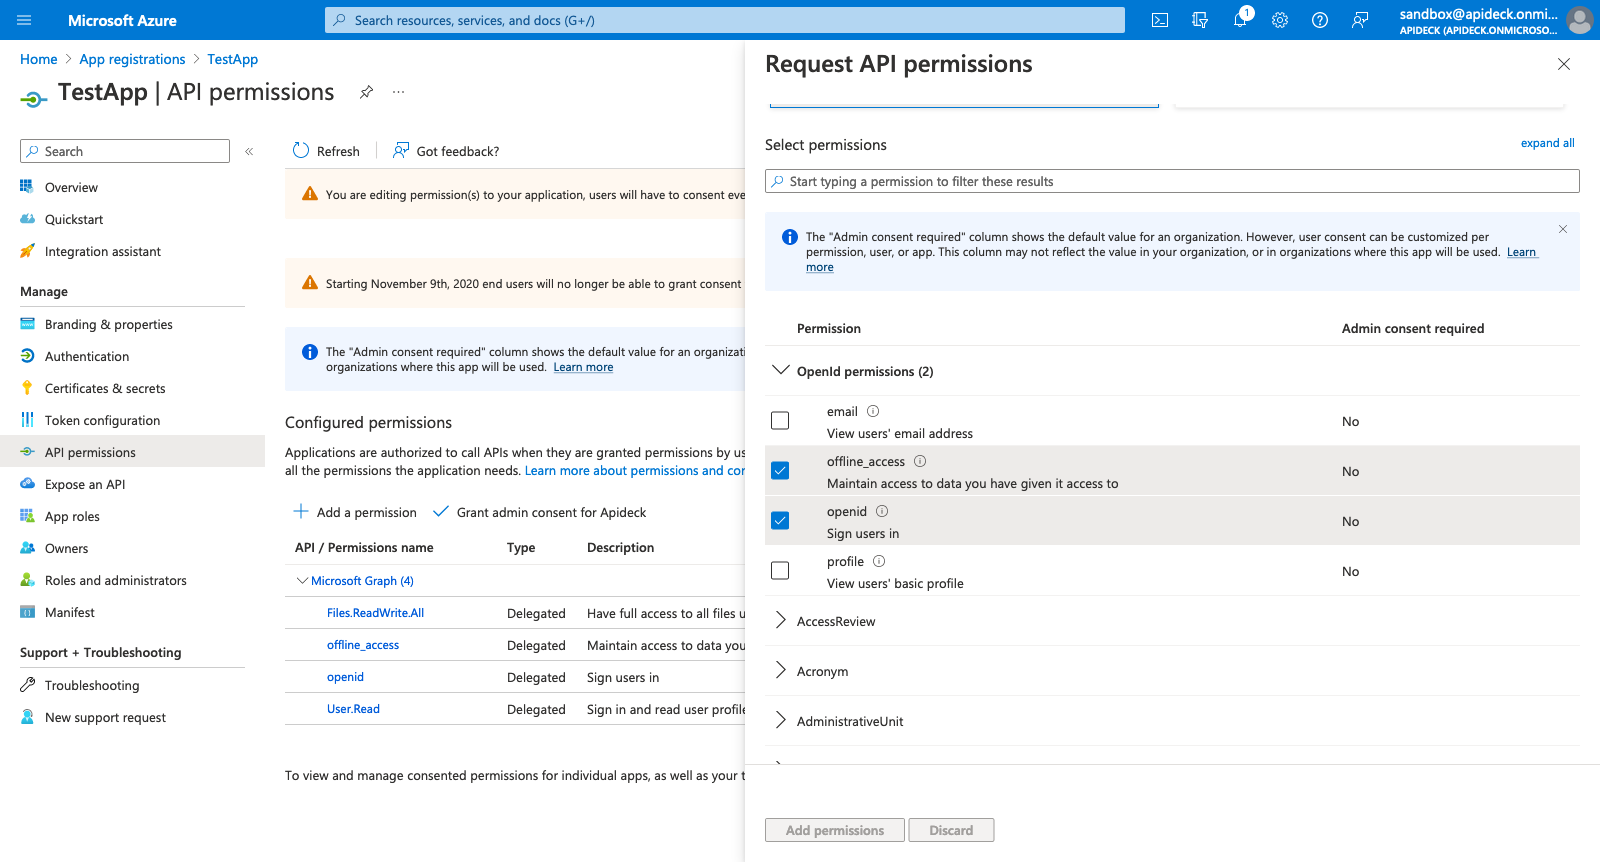
3. Add permissions
After your app is created, select API permissions in the sidebar.
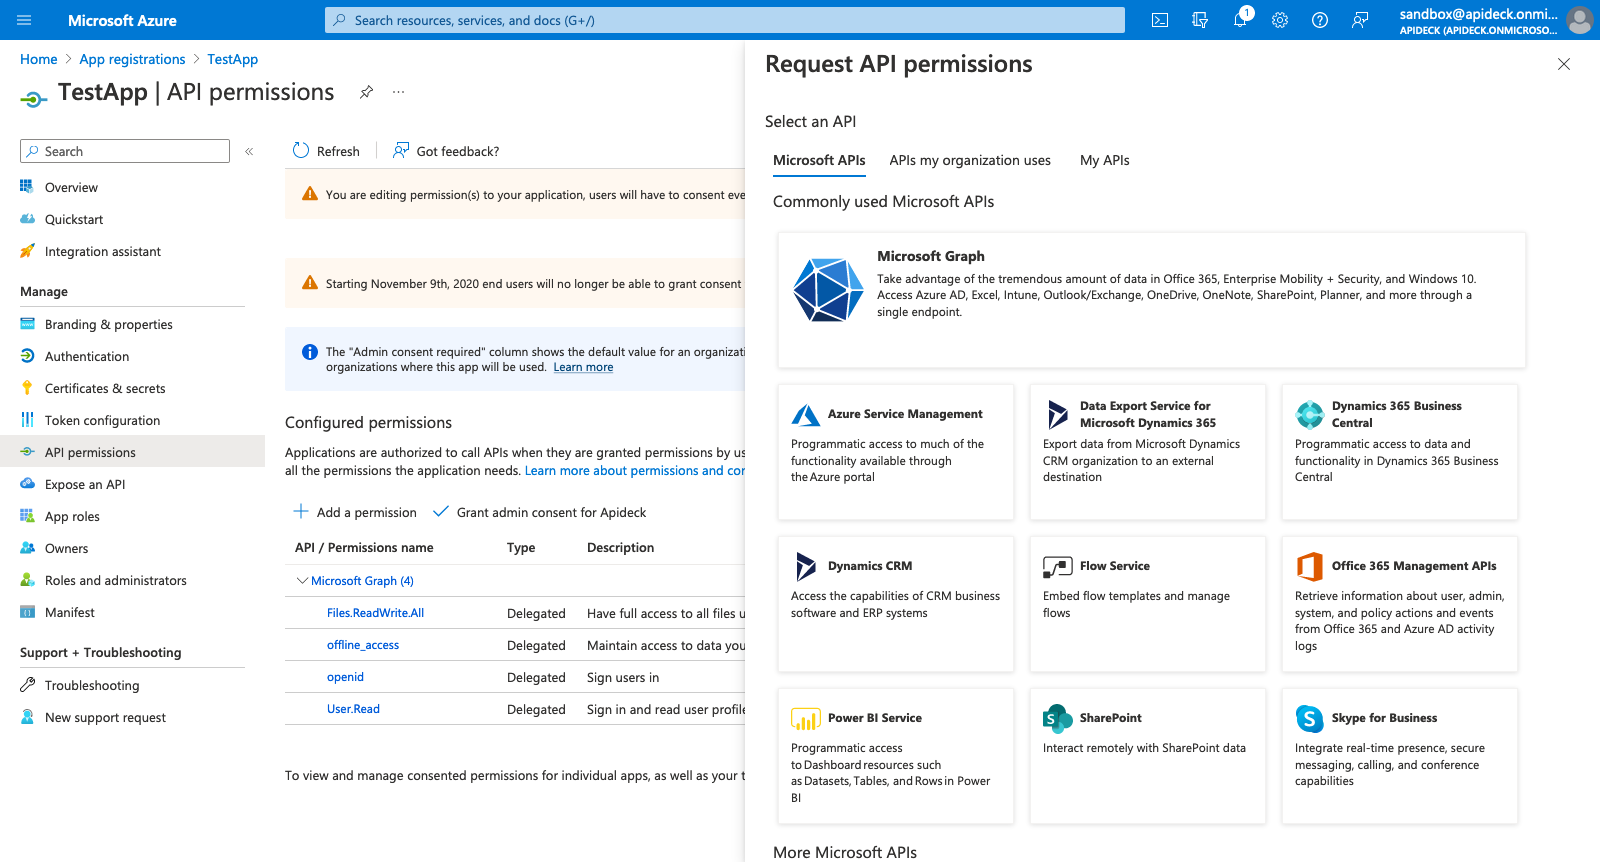
Select Add a permission > Microsoft Graph > Delegated Permissions and choose:
openid
offline_access
Sites.ReadWrite.All
If your app only needs read access to files, you can select
Sites.Read.Allinstead of
Sites.ReadWrite.All. In this case you should update your scopes in the Apideck dashboard to match these permissions.
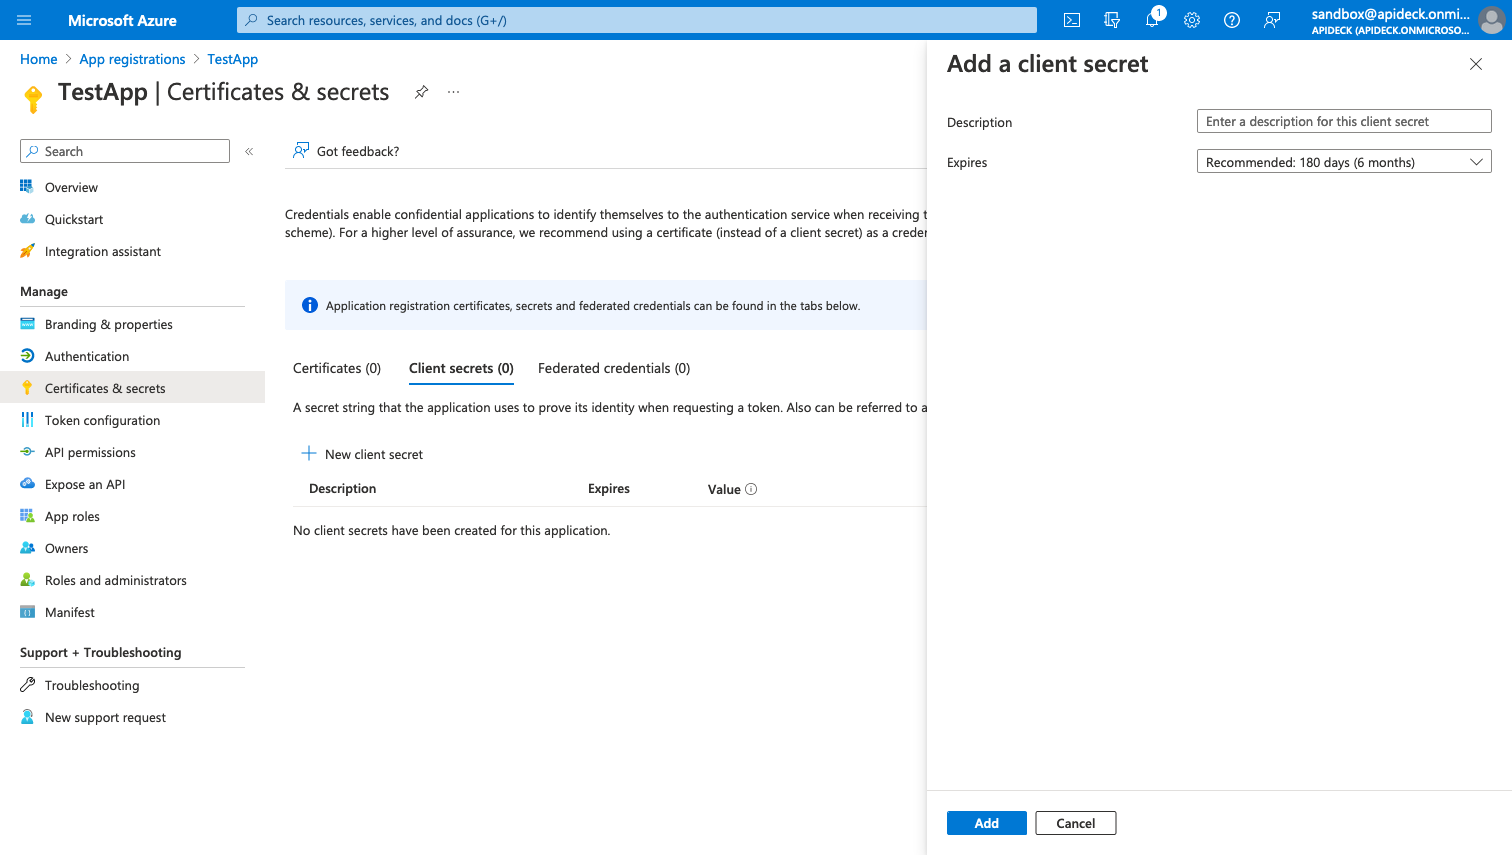
4. Generate credentials
Go to Certificates & secrets > Client secrets and select New client secret.
Enter a description and select an expiry time. After the secret is generated, make note of the Value and Secret ID for later use. You will not be able to retrieve the value after leaving this page.
5. Configure in Apideck
Head over to the Apideck dashboard for SharePoint, select Use your client credentials and enter your credentials.
- Client ID: Application ID or the Secret ID of the client secret in Azure
- Client Secret: Value of the client secret in Azure NOTE: Don't use the
Secret ID
here
Note: double check that you copied the correct values from Step 4 since OneDrive calls the Client ID the Secret ID, which can confuse
6. Complete app metadata (optional)
Go back to your app in Azure and select Branding & properties. Complete the app with your company's icon, description and more.
More information
- https://learn.microsoft.com/en-us/onedrive/developer/rest-api/getting-started/app-registration
- https://learn.microsoft.com/en-us/graph/auth-register-app-v2
FAQ and troubleshooting
Error: OAuthCodeExchangeError using your own client credentials
What causes the OAuthCodeExchangeError SharePoint error?
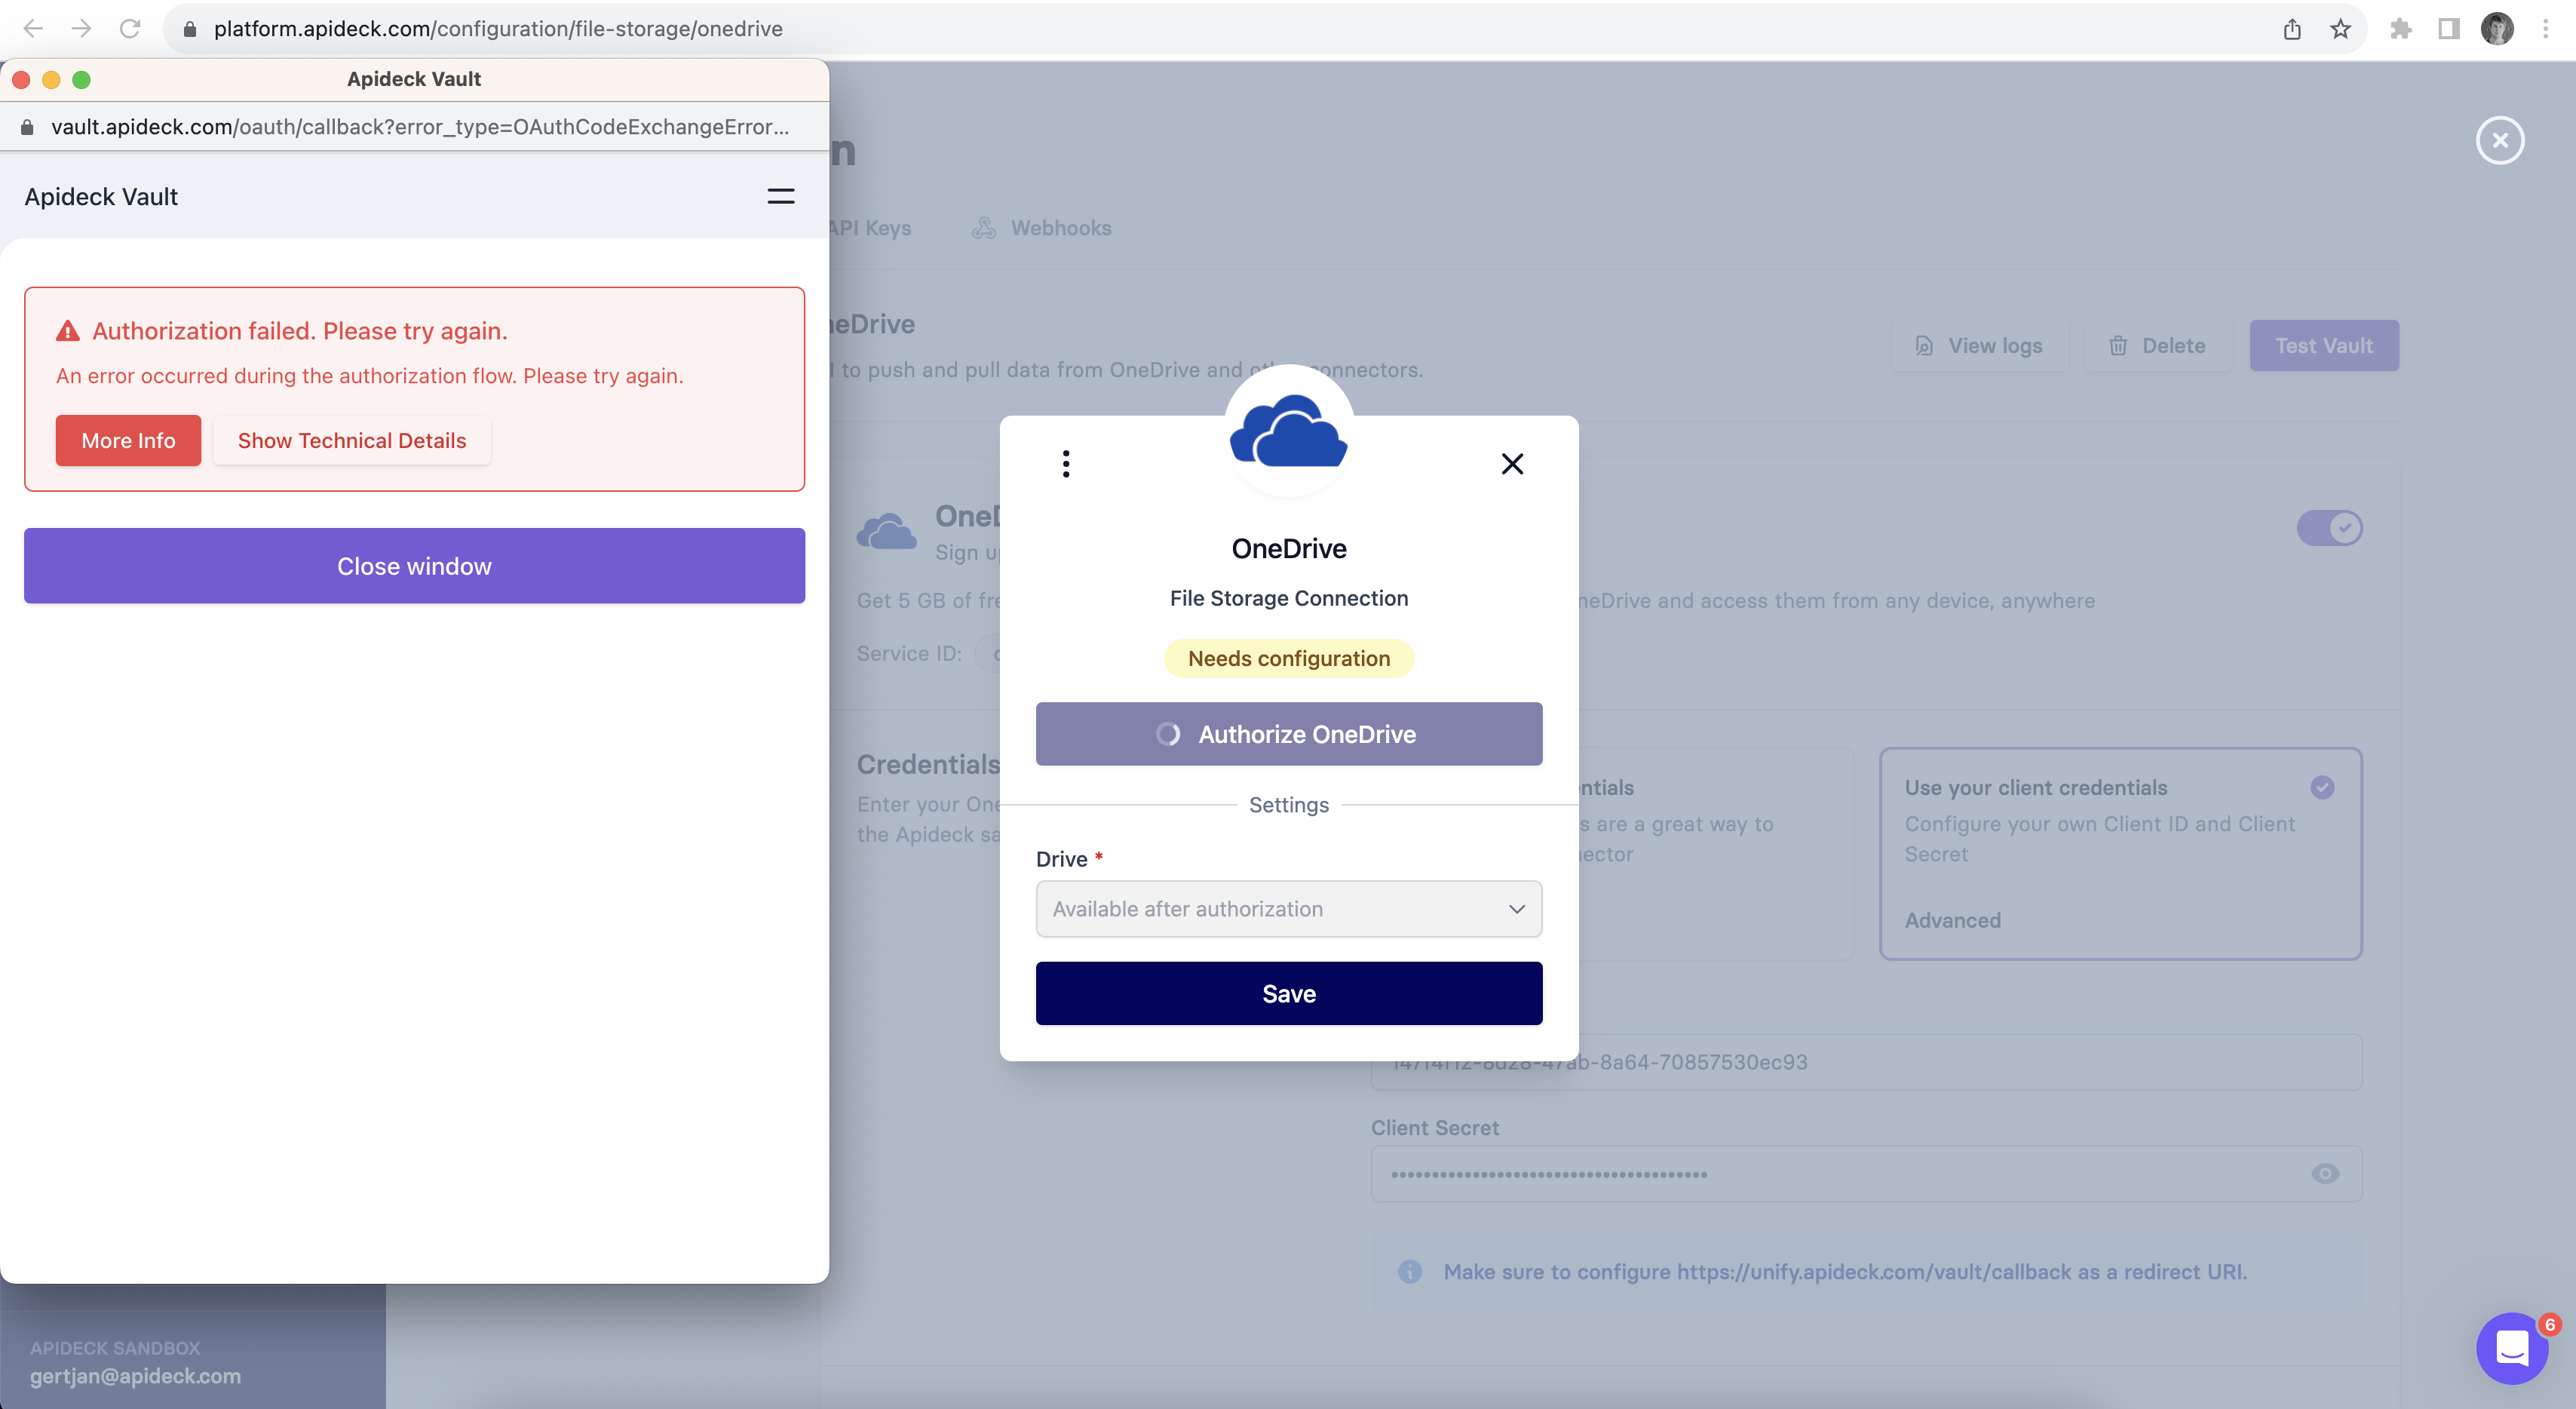
An OAuthCodeExchangeError happens when there is a mismatch of the custom credentials configured on the SharePoint connector in Apideck.
It's a common error to copy the wrong settings to the Client ID and Client secret when setting up the SharePoint connector for the first time. Double check that you copied the right values from Step 4. The Client Secret refers to the Value and not the Secret ID when creating the Client Secret.
Error: OAuthCodeExchangeError using Apideck credentials
This error can also occur if the account being used to authenticate in SharePoint does not have SharePoint enabled in Microsoft apps. Ensure that SharePoint is activated for the user's account by following the instructions on how to sign in to SharePoint.