Salesforce guide for creating an OAuth app
Salesforce is a leading customer relationship management (CRM) platform that helps businesses of all sizes manage and grow their customer relationships. With the Salesforce CRM connector, you can easily connect your Salesforce account to Apideck and automate your customer relationship management workflows
Salesforce OAuth App Registration
Create your OAuth app
Go to the Salesforce Portal (https://login.salesforce.com) and sign in with your Salesforce account.
After you are logged in, in the side menu, go to the “Platform tools” section >> “Apps” >> “App manager”
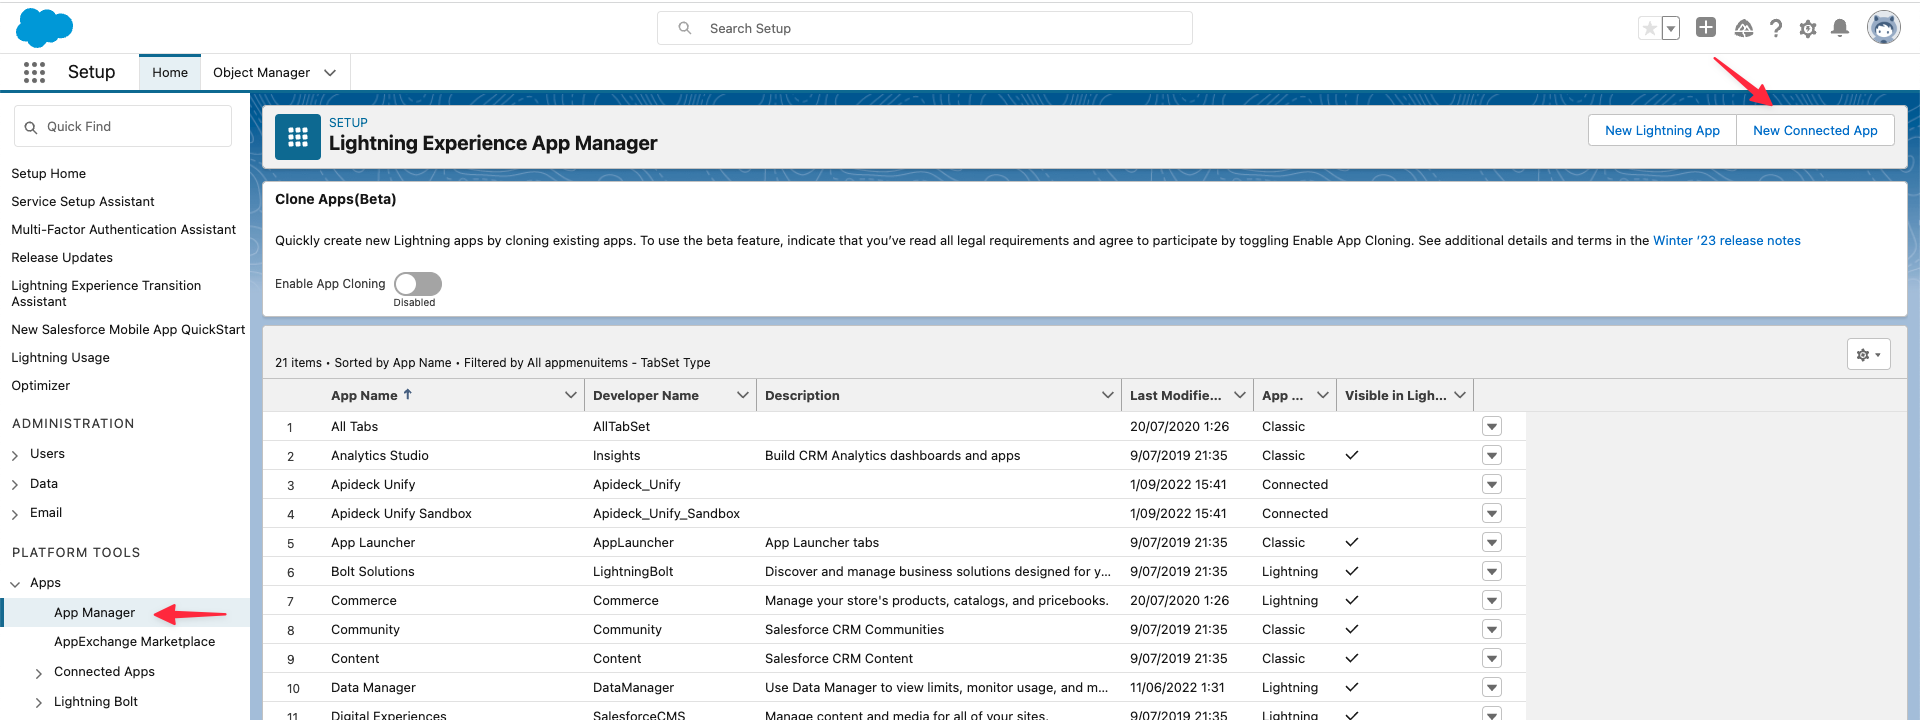
In the App manager overview click New Connected App button in the top right, to create a new OAuth app in Salesforce.
You will be presented with a form like this:

Basic information

Fill in the following required fields under “Basic Information” section:
- Connected App Name: the name to identify the connected App, for example “Apideck”. The connected app name must be unique within your org.
- API name: the API Name is a unique identifier that is used to refer to the app within the Salesforce environment. For example, "unify_apideck".
- Contact Email: the email address of the person who is responsible for the app. It is useful for troubleshooting purposes, as it allows Salesforce administrators to contact the app developer if there are any issues with the app.
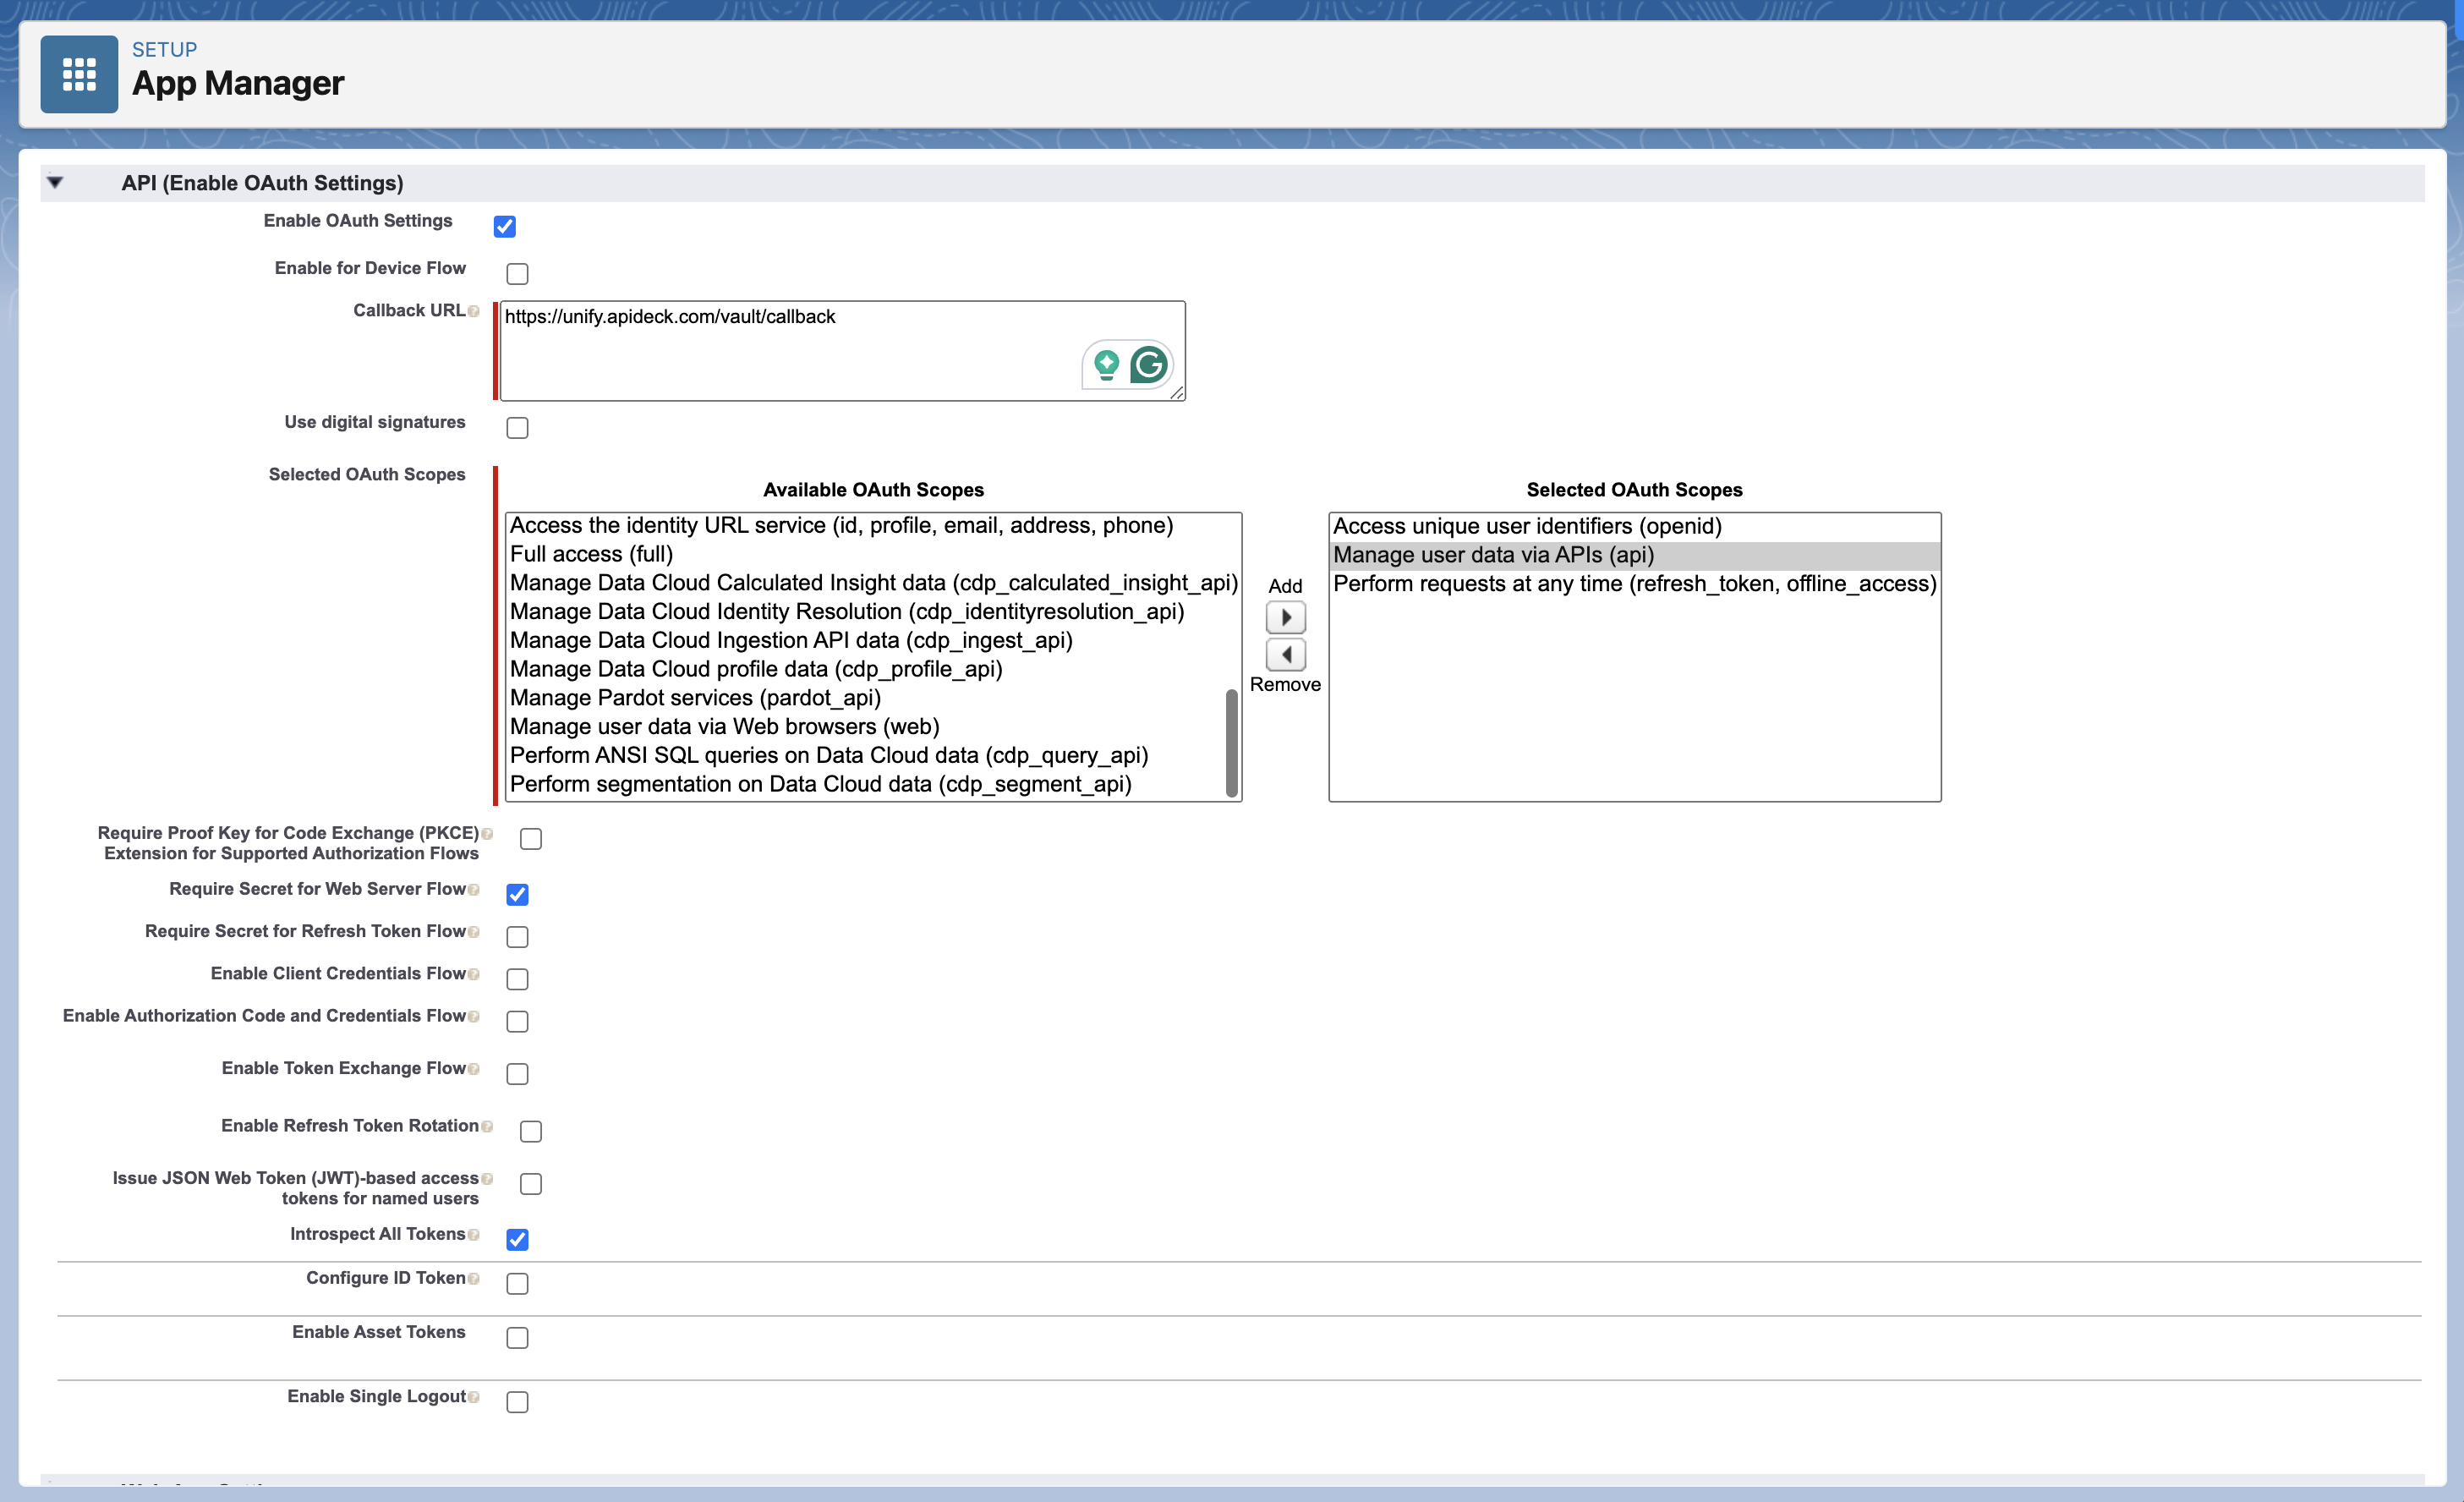
OAuth scope settings
In the “API (Enable OAuth Settings)” section of the form, be sure to toggle “Enable OAuth Settings” on.
-
In the Callback URL field, enter https://unify.apideck.com/vault/callback
-
In the Selected OAuth Scopes field, select the scopes needed for you to access the Salesforce API
Salesforce has a wide range of Oauth scopes, at minimum to be able to use the Salesforce API via Unify, you would need the scopes:
- “Manage user data via APIs (api)”
- “Access unique user identifiers (openid)”
- “Perform requests at any time (refresh_token, offline access)”
In case you want to use different operations or Salesforce APIs, you can use the “Full access (full)” scope.
-
Update Require Proof Key for Code Exchange (PKCE) Extension for Supported Authorization Flows: it is checked by default. You have to uncheck this option.
-
Update Require Secret for Refresh Token Flow: it is checked by default. You have to uncheck this option.
-
Update Introspect All Tokens: it is unchecked by default. You have to check this option.
If you are finished, click "Save", which will store all your preferences & App settings. It can take up to 10 minutes to take effect.
Consumer key & Secret
After you have created your Salesforce Connected app, the Consumer Key and Secret will be generated. You will need these credentials to connect your Salesforce account to Apideck.
In the side menu, go to the “Platform tools” section >> “Apps” >> “App manager”

Look for your recently created App in the list and click from the dropdown options on the "View" item.
Go to the "API (Enable OAuth Settings)" section, Click on the "Manage Consumer Details" to request the Consumer Key and Secret

After you click on the "Manage Consumer Details" button, you will be presented with a screen that contains the Consumer Key and Secret
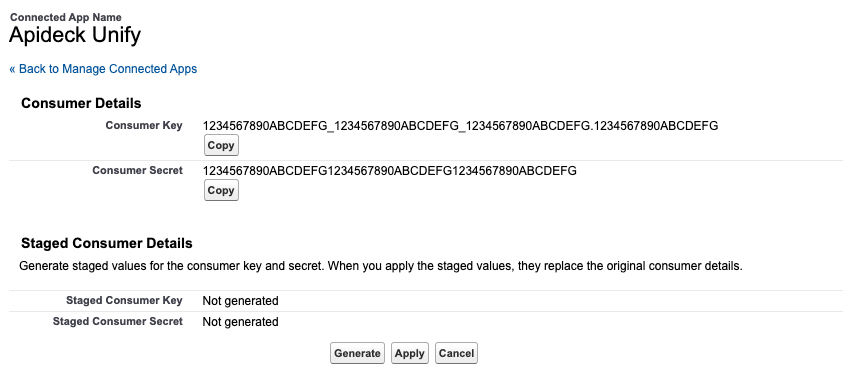
💡 TIP: Copy the Consumer key and secret and save them in a secure place. You will need them in the next step.
More details on the configuration of an OAuth Salesforce app can be found in the online help of Salesforce.
Vault Connection Setup
Go to the Apideck > Configuration > CRM > Salesforce

To connect your Salesforce account to Apideck, enter the Consumer key & Secret from Salesforce in the relevant fields. Review the scopes granted in Salesforce to ensure that they match the scopes you are requesting in Apideck. Once you have entered your credentials, click "Save settings" to save them.
To test the connection, click the "Test Vault" button. This will verify that the connection is working properly.
After completing these steps, you can allow your clients to authorize the connection to their Salesforce accounts securely.